What is the difference between prototype and production tooling?
Both make real injection-molded parts — the difference is the steel, the cavitation, and the intent. A prototype (or "bridge") tool is usually aluminum or soft steel, often single-cavity, cheaper and faster to build, meant to prove the design and make modest quantities. A production tool is usually hardened steel (sometimes pre-hardened P20 or stainless), often multi-cavity, costs more and takes longer, and is built for a low per-part cost over a long life. You choose based on how stable the design is and how many parts you'll really make.
JCH coordinates design, tooling and production through a manufacturing network, so this is general guidance on which tool fits your stage, not a pitch for one route.
The two tools, side by side
| Prototype / bridge tool | Production tool | |
|---|---|---|
| Steel | Aluminum (easy to cut, wears soonest) or pre-hardened P20, which lasts longer than aluminum | Typically hardened H13 or S7; some production tools run pre-hardened P20 or stainless (S136 / 420SS), chosen for the resin and durability |
| Cavities | Often single-cavity — one part per shot | Often multi-cavity (2, 4, 8, 16 or more) — many parts per shot to cut the per-part cost |
| Cost & build time | Lower tooling cost, fewer weeks to build; usually a cold runner | Higher tooling cost and more build weeks; often adds a hot runner, better cooling, and texture |
| Tool life | Aluminum: roughly hundreds to low-thousands of shots (more for simple parts in easy resins); a P20 bridge runs longer — all wear-limited | Typically hundreds of thousands to millions of shots, depending on steel and resin |
| Best for | Proving the design, bridge quantities, pre-launch | Lowest per-part cost once volume is real |
The key thing both share: they are real molds that run on an injection press, so parts come out in your production resin and behave like production parts. That's what separates prototype tooling from 3D printing — and what makes a bridge tool a true rehearsal for production, not just a mock-up.
What a bridge tool does and doesn't prove. A bridge tool is great for proving the part — fit, function, material, and most cosmetic issues. It's less reliable for proving the process: a prototype tool often has simpler cooling, a cold runner, and single-cavity gating, so its cycle time and gate location won't necessarily transfer to a multi-cavity hot-runner production tool. Tight tolerances can also drift sooner as soft steel wears. Treat the bridge run as validation of the design, and expect the production tool to re-optimize cooling, runner, and cavitation.
Why the distinction matters
Each tool trades up-front cost against per-part cost and life. Paying for a hardened production tool before the design is locked is the expensive mistake — changes to hardened steel cost real money, and you may discover them only after the tool is cut. Running high volume on a soft bridge tool is the opposite mistake — it wears out mid-program and precision drifts. Matching the tool to the stage is the whole game: a cheap, fast tool while you're still learning; a durable, efficient tool once you're committed.
The usual path: bridge first, then production
A common route for new products: build a lower-cost bridge tool, run a few hundred to a few thousand parts to prove the design and the market, fix anything the run exposes while changes are still cheap, then invest in a hardened multi-cavity production tool once the part is stable and demand is real. It's the same logic behind low-volume production and why there's no fixed minimum order quantity — the first quantity exists to de-risk the big tool, not to hit a number.
How to decide which tool you need
- Is the design stable? If you're still iterating, stay on a prototype tool; lock the design before cutting hardened steel.
- What's your real lifetime volume? Low or uncertain favors a bridge tool; high and steady justifies a production tool.
- How fast do you need parts? A bridge tool is quicker to build, which matters for a launch or a bridge between runs.
- What tolerances and finish does the part need? Very tight tolerances or a demanding texture can push you toward a production-grade tool sooner.
- Do you own the tool and drawings? Confirm it — so the move from prototype to production is a clean step up, not a restart.
What to measure on the prototype run and hand to the production toolmaker
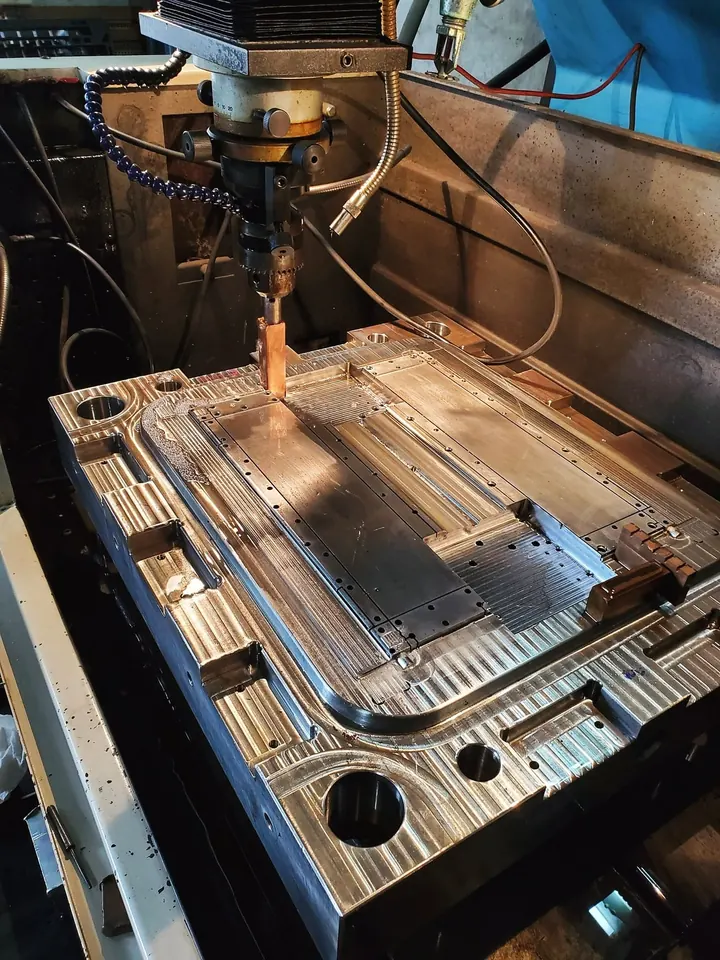
The most useful output of a prototype tool is not the parts themselves but the measurements they carry. Written down while the tool is still in the press, that data lets the production toolmaker start from how your resin behaved in a real mold rather than from a datasheet range. Protolabs makes a related point: designing for rapid molding, with even walls and proper draft, also simplifies the production mold.
| Capture | How | What it changes on the production tool |
|---|---|---|
| Shrink on each critical dimension, along and across the flow | Measure conditioned parts against the prototype steel sizes. ISO 294-4 treats shrinkage parallel and normal to the flow as separate values. | The shrink allowance for each production cavity dimension |
| Flow front, knit lines and gas traps | A short-shot series, photographed in fill order | Gate position, venting, and where to core out or thicken a wall |
| Warp | Parts checked on a surface plate or a simple check fixture | Cooling layout, rib pattern, ejection balance |
| Drag, sticking and ejector marks | Inspect walls and show faces right after ejection | Draft angles, texture depth, ejector pin positions |
| Settings that made good parts | The setup sheet: barrel and tool temperatures, packing pressure and hold time, cycle | A starting point only, since production cooling and runner differ |
| Assembly and test failures | A numbered change list tied to the part revision | The frozen revision the production steel is cut to |
Two cautions that keep the numbers honest
- Same grade, same colorant. If the prototype run used a substitute grade, every shrink figure above describes the wrong material.
- Aluminum is not steel. Aluminum draws heat out of the part faster than tool steel, so shrink and warp from an aluminum tool are a closer estimate than a datasheet, not a guarantee. Ask for critical production features to be cut steel-safe so the T1 correction only removes metal; the shrinkage calculator shows which way each feature should lean.
Put the data list on the prototype tool order as a deliverable, next to the parts, and review it with the production toolmaker before the production design is signed off. The samples and first articles page covers how the production tool's own first shots are then approved.
Sources for this section:
- Bridging the Gap Between Prototyping and Production - Protolabs
- ISO 294-4:2018 Plastics - Injection moulding of test specimens of thermoplastic materials - Part 4: Determination of moulding shrinkage - EVS
Common questions
What is the difference between prototype and production tooling?
Both make real molded parts; the difference is the steel, cavitation, and intent. A prototype/bridge tool is aluminum or P20, often single-cavity, cheaper and faster, for proving the design; a production tool is usually hardened steel (sometimes pre-hardened P20 or stainless), often multi-cavity, pricier but built for low per-part cost over a long life.
Is prototype tooling the same as 3D printing?
No. Prototype tooling is a real metal mold that runs on an injection press, so parts come out in your production resin. 3D printing makes parts directly with no mold, in printer materials that are often less representative. Prototype tooling is the bridge between printing a few and committing to a hardened tool.
When should I move from prototype to production tooling?
When the design is stable and the volume justifies it. Keep iterating on the cheaper tool while the part changes; once it's locked, demand is proven, and the run rate repays a bigger tool, build the production tool. The prototype run is how you reach that confidence.
How long does a prototype or bridge tool last?
It's wear-limited, not rule-limited — an aluminum bridge tool typically suits a few hundred to low-thousands of parts (more for simple parts in easy resins), and a P20 bridge runs longer still, before precision drops. That's the trade: low cost and speed for shorter life. Plan the tool to your lifetime volume.
Can I convert a prototype tool into a production tool?
Usually you build a new production tool rather than convert a soft one — aluminum can't be hardened anywhere near tool-steel levels, and a single-cavity tool doesn't become multi-cavity. What carries over is the proven design and the lessons learned. Keep tool and drawing ownership so the production tool is a clean step up, not a restart.
JCH Design & Manufacturing can look at your part, your volume, and how settled the design is, and tell you whether to start on a bridge tool or go straight to production tooling — and how to make the first tool a rehearsal for the second. Send a sample, drawing, or description with your quantity; NDA first.
Book a 30-minute callAsk JCH about prototype or production tooling
Not sure whether to start with a prototype tool or go straight to production steel? Ask our AI assistant. It answers from this website, and Jack follows up if you want.
AI assistant. Answers can be wrong; nothing it says is a quote or a promise.