Can I move my existing mold to a new supplier?
Yes — a tool transfer is a routine, well-understood process if you own the mold and can take possession — though it is a re-qualification, not a plug-and-play swap. What moves is more than the steel: the tool, the drawings and CAD, the documented process, any hot-runner settings, and spare parts. The new shop inspects it, mounts it, samples it, and dials in the process. The first thing to settle is ownership — if your current supplier owns the tool, you generally can't move it without a written release or a buy-out.
JCH coordinates the transfer and re-qualification through a manufacturing network; this is general guidance, not a pitch for one shop.
Step one: do you actually own it?
Check who paid for the tool and what your agreement says. If you paid for the tooling and your contract or PO assigns ownership to you — ideally with the tool marked as your property and the drawings in hand — it's yours to move. If the supplier funded or amortized the tool into the part price, they may own it, so a move may need a written release or a buy-out. Ownership and possession are separate: you can own a tool that physically sits at the supplier's plant. Settle this first, because it decides whether a transfer is possible at all or whether you need a new tool.
What transfers (the whole package)
| What moves | Why it matters |
|---|---|
| The physical mold | The tool itself, with its current condition and any wear |
| Drawings & CAD | So the new shop can inspect to spec and service the tool |
| Documented process | Fill/pack/cool parameters, cycle time, special startup — the recipe |
| Hot-runner settings | Controller zones/temperatures for a hot-runner tool |
| Material spec | Resin, grade, colorant, drying |
| Inspection standard + spares | Gauges, the approved standard, ejector pins and wear parts |
If some of this is missing — no drawings, no documented process — it can still be done, but the new shop reverse-engineers or re-develops it, which adds time. Getting the documentation in the handover is what makes a transfer fast rather than a rebuild.
The transfer, step by step
- Confirm ownership and arrange release of the tool and its data.
- Assess the tool's real condition and fit — cavities, ejection, hot runner, parting line, documented mold-maintenance history / shot count and spare parts — and check it fits the new press: tonnage, platen size, shut height, and the cooling and hydraulic connections. Do this before it ships, so refurbishment or adapter needs are known up front.
- Ship and incoming-inspect the tool at the new shop against the drawings.
- Mount and sample (T1) — run first parts and measure them against your standard.
- Re-develop the process on the new press and dial in the parameters.
- First-article inspection + a qualifying lot before production volume.
Why it won't run identically on day one
Expect a re-qualification, not plug-and-play. The new shop's press, controller, dryers, and cooling differ from the old one, so the process must be re-established and the T1 samples checked before production. A well-documented tool in good condition transfers quickly; an undocumented or worn tool takes longer. Treat day-one parts as validation samples, not sellable product, until they meet the standard.
What can go wrong (and how to prevent it)
- Worn or damaged tool — cavities, ejectors, or a tired hot runner needing refurbishment. Prevent it: inspect condition before shipping.
- Missing drawings or process — forces reverse-engineering. Prevent it: get the documentation in the handover.
- Hot-runner / press-fit mismatch — controller zones, connectors, press tonnage, platen size, shut height, or water/hydraulic hookups that don't match the new machine. Prevent it: compare the tool's requirements to the target press before shipping, and plan any adapter or controller swap.
- Uncooperative incumbent — slow to release the tool or data, or asserting a lien/hold for unpaid balances. Prevent it: confirm ownership, settle any outstanding balance, and get a written tool-release before the move; plan the handover early and professionally.
Press-fit data to compare before the mold ships
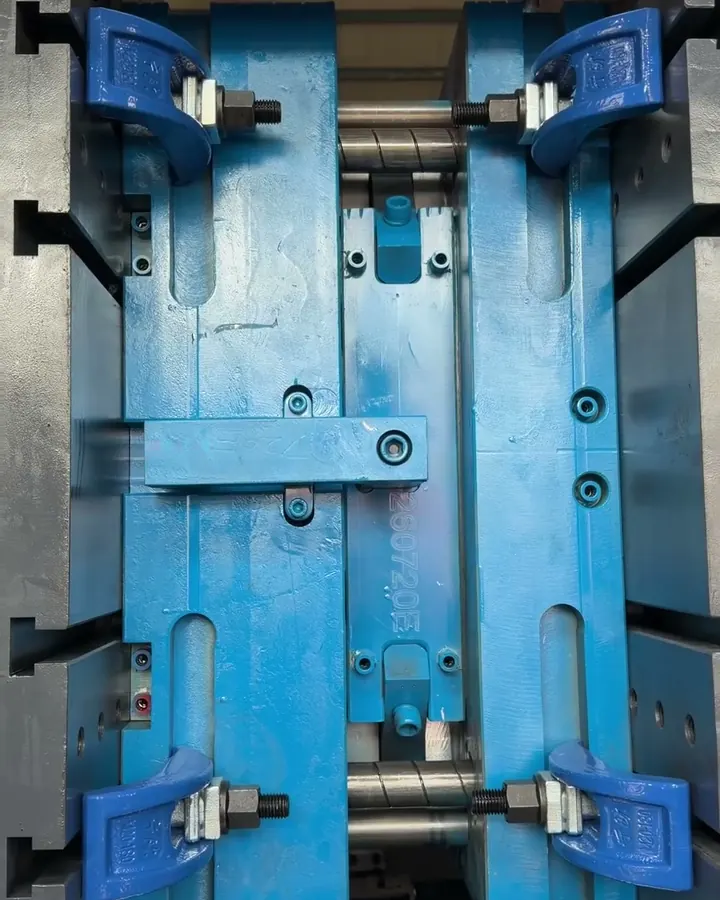
Checking the tool against the new press means laying the mold drawing next to the receiving press specification, line by line. A mismatch found on paper costs an adapter; one found at the press costs a wasted trial. In his mold-design review checklist for MoldMaking Technology, Jerry Miranda lists the minimum and maximum mold height needed to clear the press tie bars under "the mold fits in the desired press".
| On the mold | Compare with the press | If it does not match |
|---|---|---|
| Overall width and height | Clear space between tie bars; platen size | Side loading or a larger press |
| Mold (stack) height | Press minimum and maximum mold height | Too thin: add a riser plate. Too thick: a different press |
| Opening needed to eject the part | Opening stroke and daylight | A deep part may not fall clear or leave room for a robot |
| Locating ring diameter | Platen locating bore | Plastics Technology's Jim Fattori notes an undersized ring, or one seated in an oversized counter-bore, misaligns the sprue with the nozzle tip |
| Sprue bushing radius and orifice | Nozzle tip radius and orifice | Change the nozzle tip, or the joint leaks and drools |
| Ejector knockout pattern | Press ejector rod positions | Add or move knockout rods and couplers |
| Shot weight | Barrel capacity (check with the shot-size calculator) | Too small a barrel cannot fill; too large leaves resin sitting hot between shots |
| Water fittings, hot-runner plugs, thermocouple type, core-pull hydraulics, valve-gate air | What the press and auxiliaries supply | Adapters or a different controller; a thermocouple type mismatch reads false temperatures |
Getting the mold there in the condition it left
- Water out. Drain every cooling circuit, blow it dry with air and plug the ports. Standing water inside a closed tool is a rust source, and water that freezes in transit can crack steel.
- Steel protected. Coat exposed steel with rust preventive once the mold is at room temperature. For long or humid shipments, Cortec's case history in Plastics Machinery & Manufacturing adds a vapor corrosion inhibitor and shrink-film wrap around the whole mold.
- Halves locked. Fit a safety strap across the parting line and secure slides and lifters. Fattori notes that lifting with a single eyebolt is the most common reason mold halves separate.
- Hot runner packed as a set. Cap the connectors, label each zone and ship the controller, cables and zone map with the tool.
- Arrival check. Remove the strap, compare with the pre-ship photos, pressure-test the water circuits and check heater and thermocouple continuity.
Sources for this section:
- What to Check in a Mold-Design Review - MoldMaking Technology
- What You Need to Know About Locating Rings, Part 1 - Plastics Technology
- What You Should Know About Injection Mold Safety Straps - Plastics Technology
- Lessons on rust prevention in molds - Plastics Machinery & Manufacturing
Common questions
Can I move my existing mold to a new supplier?
Yes, if you own the mold and can take possession — a transfer is common and usually simpler than feared. The tool should move with its drawings, documented process, hot-runner settings, and spares (missing items can be re-developed, at a cost in time); the new shop inspects, mounts, samples, and re-qualifies it.
Do I own my mold, and how do I find out?
Check who paid for it and what the contract/PO says. If you paid and ownership is assigned to you, it's yours to move; if the supplier funded or amortized it, they may own it (so a move may need a written release or a buy-out). Ownership and possession are separate — settle this first.
What transfers besides the physical mold?
The drawings/CAD, the documented process (fill/pack/cool, cycle, startup), hot-runner controller settings, the material spec, the inspection standard and gauges, and spare parts. Missing pieces can be reverse-engineered, but that adds time.
Will the tool run the same at the new shop?
Not automatically — the new press, controller, dryers, and cooling differ, so the process is re-established and T1 samples checked before production. Plan for first-article inspection and a qualifying run; treat day-one parts as validation, not sellable, until they meet spec.
What can go wrong in a tool transfer?
A worn/damaged tool needing refurbishment, missing drawings/process (reverse-engineering), a hot-runner/interface mismatch, or an uncooperative incumbent. Most are manageable if the transfer starts with confirming ownership and inspecting real tool condition — not shipping and hoping.
JCH Design & Manufacturing can plan and run a tool transfer — confirm ownership, assess the tool's condition, re-develop the process, and re-qualify it with first-article inspection — so the move is managed, not a gamble. Tell us the part, whether you own the tool, and its condition; NDA first.
Book a 30-minute callAsk JCH about moving your mold
Have a mold at a supplier you want to leave? Ask our AI assistant about ownership papers, inspection and first shots at the new shop. It answers from this website, and Jack follows up if you want.
AI assistant. Answers can be wrong; nothing it says is a quote or a promise.