Can an injection mold be changed after it's built?
Yes, most molds can be changed, but the direction of the change decides how hard it is. Cutting steel away, which makes a wall thicker, a boss bigger or a hole smaller, is routine machining. Adding steel back, for a thinner wall or a bigger hole, means welding, a new insert, or a new block, and often refinishing the face.
The one rule that decides most changes
A mold is a block of steel with the part's shape cut into it as empty space. Cutting more steel away is ordinary machining, the same work that built the tool. Putting steel back is not: it means welding, fitting a new insert, or remaking a block. From the part's point of view, the rule flips. Changes that add plastic (a thicker wall, a bigger boss, a new rib, a smaller hole) are usually cheap. Changes that remove plastic (a thinner wall, a smaller boss, a bigger hole, deleting a rib) need steel added back.
That's what "steel-safe" (or "metal-safe") means. A toolmaker who isn't sure a dimension is final cuts it so any correction will be a removal. Which side of the mold forms a feature decides the direction, so it helps to know your cavity and core before you plan a change.
Easy to hard: how common changes rank
| Change to the part | What happens to the steel | Typical route | Watch for |
|---|---|---|---|
| Thicker wall, taller or wider rib, larger boss | Remove steel | Re-machine or EDM the pocket | Sink on the opposite face if the new section gets thick |
| Add a rib, boss, or raised text | Remove steel | Cut a new pocket | Polished or textured faces nearby need refinishing |
| Smaller hole | Remove steel from the pin or core | Grind the pin, or fit a smaller one | Pin strength if it gets slender |
| Larger hole, thinner wall, smaller boss | Add steel | New pin or insert; weld and recut on solid steel | Weld witness lines on cosmetic faces |
| Delete a feature | Fill its pocket | Plug or weld, then recut | Same as above |
| Move a gate or parting line, add an undercut | Rework of the tool's layout | New slides or lifters, new gate insert, sometimes a new block | Fill, cooling and warp change too; re-sample fully |
At a glance, the same changes grouped by how much steel work each one usually takes:
| Change type | What it means on the tool | Difficulty |
|---|---|---|
| Add plastic (thicker wall, bigger boss, smaller hole) | Remove steel: re-cut or EDM the pocket, or grind the core pin. Steel-safe, the same machining that built the tool. | Easy |
| Remove plastic (thinner wall, bigger hole, delete a feature) | Add steel back: a new insert or pin, or weld a solid block and re-cut. A cosmetic face may also need refinishing. | Hard |
| Texture or finish change | Re-texture or re-polish the affected face. A spot repair often shows a witness line, so the whole face may be redone. | Moderate |
| Add a cavity | Cut and fit another part-forming set into a new or spare plate pocket, then balance fill and cooling across the cavities. | Hard |
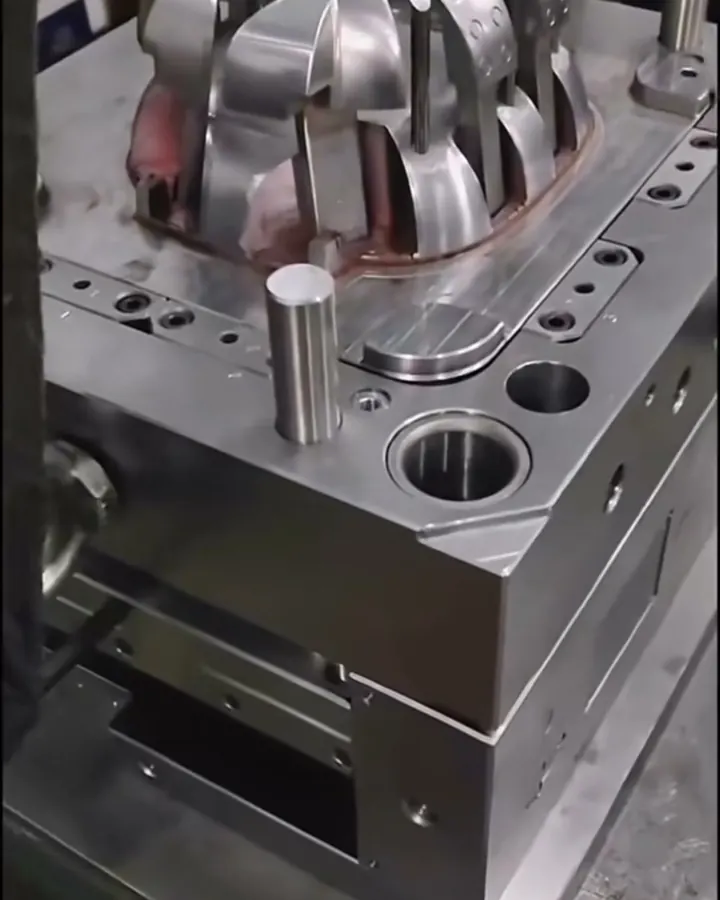
How steel gets added back
Replaceable inserts
The cleanest route is a feature that sits in its own insert or pin. Swapping an insert is a self-contained machining job, and the old one can be kept as a fallback. Rex Plastics makes the point that when a dimension could need to move in either direction, a replaceable insert is a better plan than relying on steel-safe allowance alone. That is why toolmakers often put logos, date codes, snap features and anything still under test into inserts.
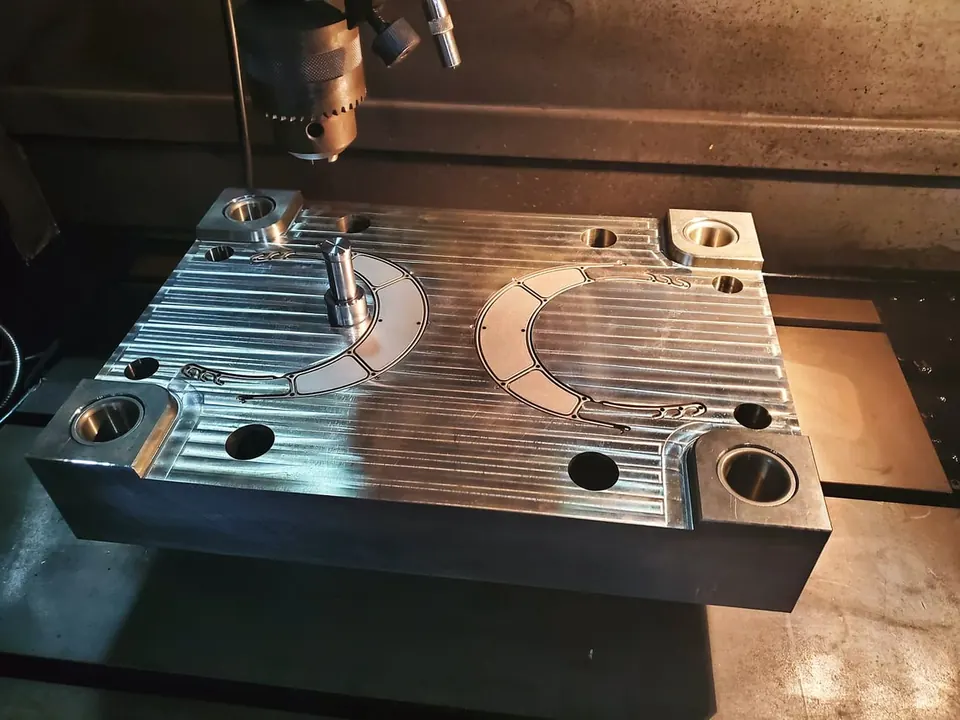
Welding
When the feature is cut into a solid block, steel is built back up with weld and then recut. Small, precise additions are usually laser welded: Uddeholm describes filler wire between 0.2 and 0.7 mm in diameter, laid spot by spot and line by line. Larger build-ups use TIG. The details matter more than most buyers expect:
- Matching filler. The filler should be similar in composition to the mold steel, or the weld ends up with a different hardness than the steel around it.
- Preheat. For a prehardened plastic-mold steel at 290 to 330 HB, Uddeholm's welding guide gives a preheat around 225 °C ± 25 °C for TIG work on its Impax Supreme grade. Other grades and hardened tools have their own figures; ask the toolmaker which they're following.
- Finish after welding. Uddeholm recommends that the final runs on areas to be polished or photo-etched are made by TIG, which is less prone to pores and inclusions.
Textured and polished faces
This is where a "small" change gets bigger. A texture shop that repairs molds warns that weld in a different steel can etch at a different rate and leave a witness line around the repair, and that a weld cooled too fast can do the same even with matching filler. Polished faces can show the outline of a weld too. In practice, a change on a show face may mean re-texturing or re-polishing the whole face, not just the patch. See surface texture and finish for how those finishes are specified.
Worked example: three corrections after the first samples
Take a hypothetical housing molded in a prehardened steel tool. First samples come back with three problems.
- Boss outer diameter is 6.10 mm; the drawing says 6.30 mm. The boss is formed by a round pocket in the cavity. Opening the pocket by 0.10 mm a side makes the boss bigger. That is steel-safe: a machining or EDM job, followed by a check on the next shots.
- A screw pilot hole is 3.15 mm; the screw needs 3.00 mm or less to hold. The hole is formed by a core pin, so the pin has to get 0.15 mm smaller. Grinding it down, or swapping in a smaller pin, is steel-safe: no weld. Had the hole come out too small, the pin would have had to grow. If the pin is a separate part, that's a new pin. If it was cut as part of the core block, it's a weld and recut, or the toolmaker drills out the stub and fits a pin, which is how many changes end up as inserts.
- A 2.6 mm wall shows sink, and the fix is to thin it to 2.0 mm. Thinning a wall closes the gap between cavity and core, so one of them gains 0.6 mm of steel across the whole face. On a textured face that means welding or a new insert plus re-texturing. Before committing, it's worth asking whether coring out the thick spot behind the sink, or adjusting packing, solves it with less steel work. Sink marks covers those options.
Two of the three were cheap only because of which side of the steel formed them. The third was expensive because the change ran in the wrong direction across a large face.
Before you cut anything: make sure it's an offset, not scatter
Steel changes move the average. They don't fix variation. If a dimension wanders shot to shot, recutting the tool just moves the center of the scatter. Rex Plastics recommends confirming the measurements are reliable and the process is stable before modifying a tool. Measure several shots from a settled process, from every cavity, and then decide. The tolerance you're chasing should be achievable for the resin before any steel is touched.
Designing a part so the tool can be revised
- List the dimensions that may change after testing: fits, snaps, sealing faces, screw bosses. Ask the toolmaker to leave those steel-safe and to say which direction each one is safe in.
- Put uncertain features, logos and date codes in inserts or pins. Ask for them on the tool drawing.
- Start walls on the thin side, bosses on the small side and holes on the large side. Protolabs puts it simply: you can add plastic, but you can't take it away.
- Leave molded alignment pins and posts off until you know you need them: adding one later is a pocket cut into the steel, while deleting one means filling that pocket.
- Delay texture and high polish on faces likely to change until the samples are signed off.
- Choose tool steel with revisions in mind. Softer, prehardened steels are easier to recut and weld than fully hardened ones; aluminum vs steel tooling and the mold steel selector cover the trade-offs.
When the answer changes
With rapid tooling, Protolabs notes that adding metal can be difficult or, for all practical purposes, impossible, so a change in the wrong direction often means a new insert or a new tool. Hardened steel tools take welds but need careful heat control, and recutting hardened steel is slower. Moving a gate, adding a slide, or changing the parting line touches the layout of the whole tool, and the part has to be sampled again in full rather than checked on one feature. And every change, small or not, should be recorded against the tool and the drawing revision. The paperwork side is in the note on engineering change orders; for keeping a tool healthy after the change, see protecting your tooling over time.
Common questions
What does steel-safe mean in mold design?
Steel-safe means a dimension is cut so that any later correction removes steel rather than adding it. For example, a boss is left slightly small and a hole slightly large, so both can be corrected by removing steel: opening the boss pocket or grinding the core pin. The toolmaker should tell you which direction each critical dimension is safe in.
Is welding a mold safe for the tool?
Done properly, yes. Tool steels are welded routinely with matching filler, controlled preheat and careful cooling, and laser welding handles small additions with little heat. Poor practice can crack the steel, leave hard or soft spots, or show through a texture or polish, so ask how the weld will be done and finished.
Will a modified mold make parts that look different?
It can. On textured or polished faces a weld may show as a faint outline if the filler or heat treatment differs from the base steel. Toolmakers avoid this with matching filler, preheat, and sometimes by re-texturing or re-polishing the whole face rather than spot repairing it.
Can I add a logo or text to an existing mold?
Raised text on the part is the easy direction because it means cutting into the steel. Recessed text on the part means adding steel, which is harder. Many tools carry logos and date codes on small inserts so they can be changed without touching the main cavity.
Do I need new samples after a mold change?
Yes. Any change to steel should be followed by new shots measured on the changed features and anything near them. If the gate, parting line or a slide changed, sample the whole part again, because fill, cooling and warp may have shifted, and update the approved sample.
Sources
- Protolabs - A Guide to Steel Safe and Metal Safe Injection Molding
- Rex Plastics - When to Use Steel-Safe Design in Mold Development
- Uddeholm - Welding of Uddeholm Tool Steels (PDF)
- St. Paul Engraving - Mold Repair
Send the part file and the quantity you expect to run, and we'll review it before you commit to tooling. NDA first if you want one.
Send a part for reviewBook a 30-minute call